Blog Category283 Blogs
 Web Development
 Core PHP
 Ruby On Rails
 Yii Development
 Joomla Development
 Odoo
Odoo Python
 Ecommerce
 Magento Development Services
 Prestashop
 Hire a Developer
 Web Crawling Services
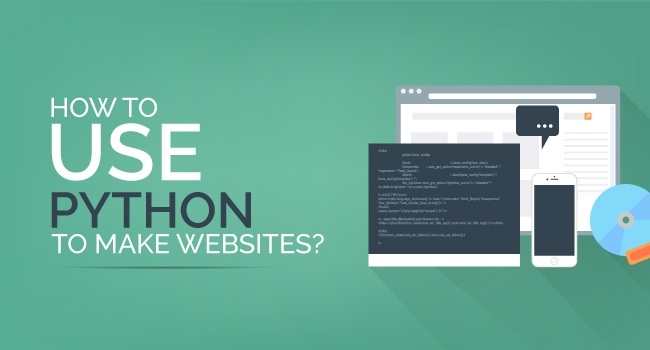
How to Build a Web Application Using Python
As you all know, Python is a widely used high-level programming level that can be used to build web applications in combination with HTTP protocols. However, you also need to employ the features of a web framework like Django that allows you to develop web applications through a clean and pragmatic design.
Choose Django as your Python framework to build a web application and you are all covered. Additionally, web applications call for the storage of data, which is taken care of by a database in contrast to a simple file. This database is akin to your spreadsheet which stores data in the form of tables. So, if you are a developer looking to build a web application using Python, this step-by-step guide handholds to create one, without any hassles.

First and foremost, it is important that you set up and create your web services by creating a project directory. You can do this through the following code:
mkdir website
cd website
Now, the next step is to install Django. You can rely on pipto install Python code. As you are aware that Python code is installed as a package, you need to list all the currently installed Python packages using the command $ pip freeze.
You can install Django using the $ pip install djangocommand. How do you create a new Python/Django Project? To set up a new project, you can use the below mentioned Django code.$ django-admin.pystartproject website
You will then see the below-mentioned structure of the folder and files that will be generated.
website
- manage.py
- website
- __init__.py
- settings.py
- urls.py
- wsgi.py
You then need to concentrate on the important files which are settings.py,manage.py, and urls.py.
As a developer, you must be accustomed to performing a number of configurations so as to set up a web application. The same goes with your Python project which employs website/settings.py. This file has a long listing of names that can define all the configurations needed by your web application. You are good to go with the default configurations for now.
You should recognize that the INSTALLED_APPS name comes as a sequence of strings. The next step is to add this to the tuple. Also note that the DATABASES name is defined as a dictionary.
How to create a database?The next step is to create a database that will store all your data. Let us now create a database by coding the following script.
pythonmanage.pysyncdbThe output is shown as below:
(django) website $ ./manage.py syncdb Creating tables ... Creating table django_admin_log Creating table auth_permission Creating table auth_group_permissions Creating table auth_group Creating table auth_user_groups Creating table auth_user_user_permissions Creating table auth_user Creating table django_content_type Creating table django_sessionYou just installed Django'sauth system, which means you don't have any superusers˓
→defined. Would you like to create one now? (yes/no): yes Username (leave blank to use 'greg'): Email address: Password: Password (again): Superuser created successfully. Installing custom SQL ... Installing indexes ... Installed 0 object(s) from 0 fixture(s)
Notice that the top-level folder website contains a file with a db.sqlite3name. This is your database file.
How to inspect the database?You then need to inspect the database file that you just created. To perform this task, you should choose the sqlite-shell-win32-x86-....zip file. You should unzip it by double-clicking it. The next step is to drag and drop this file into C:BOOTCAMPPython34.Ultimately, you need to add this to a directory on the path.

A database application is akin to a server which sends requests using clients. Here the clients the programs that you code; like the Python website. So, in order to inspect the database you would require a server that is exclusively meant for this purpose. You then need to launch the client by keying in sqlite3 db.sqlite3.
The sqlite3 program offers a new type of shell through which you can inspect your database. Below is an illustration to help you understand better.
(django) website sqlite3 db.sqlite3 SQLite version 3.7.13 2012-07-17 17:46:21 Enter ".help" for instructions Enter SQL statements terminated with a ";" sqlite> .tables auth_groupauth_user_user_permissions auth_group_permissionsdjango_admin_log auth_permissiondjango_content_type auth_userdjango_session auth_user_groupssqlite> select * from auth_user; 1|pbkdf2_sha256$12000$YqWBCAkWemZC$+hazwa/dPJNczpPitJ2J0KR8UuAX11txLlSkrtAXk5 k=|2014-˓→08-21 14:59:05.171913|1|greg||||1|1|2014-08-21 14:59:05.171913 sqlite>
It is through the .tablescommand that you can list all the tables that make up your database. These are the just the same that were created earlier by executing the .manage.py syncdb command.
If you look at the illustration closely, you will notice the select * from auth_user; is the SQL code. We are using SQL to program a database so that you can create a web application using Python. This command helps you get anything from the auth_user table. You then need to key in sqlite3 .quit to exit.
How do you run the server? The next step is to run the server through the ./manage.py runswevercommand.Now the stage is set for you to send HTTP requests using your browser as the client. You simply key in http://127.0.0.:8000/. And what do you see?

If at all you wish to quit the server at any point in time, you can do so by the ctrl + c function.
Creation and Installation of the Python Web ApplicationSince you have chosen Django as your preferred web application creating framework, you are all covered when it concerns the task of organizing your code. You can now work around a proven architecture that simplifies your web app building tasks in more ways than one.
You are now all set to create a blog that will be your Django/Python app. Through Django, you can organize your code and create a blog with the ./manage.py startapp blogcommand. Now you can view a folder dorectory that looks like this:
- blog | - __init__.py | - admin.py | - models.py | - tests.py | - views.py - db.sqlite3 - manage.py - website - __init__.py - settings.py - urls.py - wsgi.py
It is now your job as a developer to tell your website about the presence of your blog. You can do this by adding the below code to the INSTALLED_APPS tuple.
INSTALLED_APPS = ( 'django.contrib.admin', 'django.contrib.auth', 'django.contrib.contenttypes', 'django.contrib.sessions', 'django.contrib.messages', 'django.contrib.staticfiles', 'website', 'blog', )Next in line is the process of creating web services. How to create web services?
You should now start programming the server to return responses for a HTTP GETrequest. To go ahead with this task, you will need to perform two jobs:
- Match a URL to a view function
- Define the view function
Website/urls.py is the filename that matches URLs to view functions. Upon execution, once the Django server receives a URL, it tries to locate and search in this file for a match. If the match is found, the command results in a mapped function. Else, you get to see the 404 Page Not Found error.
You then need to open the views.py file in your blog app through the below-mentioned code:
fromdjango.httpimportHttpResponse defhello(request): returnHttpResponse('hello')
Your next task is to configure your website to a request that will trigger this view function of saying “Hello”! You can do this by adding a code line to website/urls.py:
urlpatterns = patterns('', url(r'^hello , 'blog.views.hello'), url(r'^admin/', include(admin.site.urls)), )
Now, your website will successfully respond to a GET request when you can see your browser http://localhost:8000displaying“hello”.
This comes to the end of the step-wise guide to code a web application using Python, its framework Django, HTTP requests,employing SQL as the database.