Blog Category283 Blogs
 Web Development
 Core PHP
 Ruby On Rails
 Yii Development
 Joomla Development
 Odoo
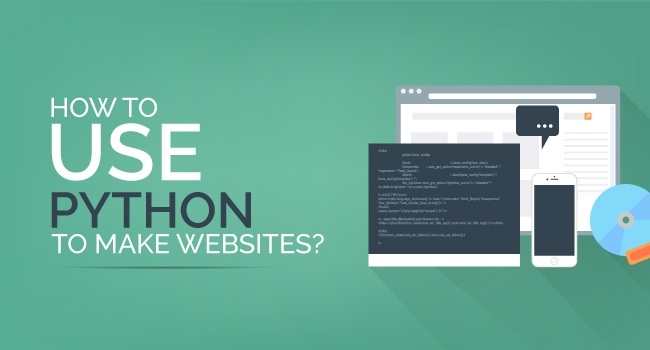
Odoo Python
 Ecommerce
 Magento Development Services
 Prestashop
 Hire a Developer
 Web Crawling Services
How To Create a Classified Website
Classified ad sites can be viewed as an online business commercial center where users pitch their services or items to anybody searching for the same.
The sold items range from mobiles to real estates, beauty products to employment, promoted with a particular heading and little messages.
In the meantime, the website proprietors can likewise include articles, blog posts and give important data that promotes their business.

While there are numerous tools and ways to build a classified ad website, utilizing WordPress theme is as yet the quickest and easiest approach.
In general, making and developing up a classified ads site with WordPress theme is an incredible method to get branding, traffic, and revenue at the same time.
This post is a model for all those who want to create their own classified site without getting tangled in coding and different technical stuff.
1. Start with a Domain NameChoose a domain name that you believe best represents your brand. Assure to pick something that is easy to remember and short.
Then decide a popular extension like “.com” or your country particular extension in case your classified ads site will be narrowed to a specific country.
After all this, it’s time to register your domain. Use any popular domain registrars such as GoDaddy, Bluehost, or you can register the domain with your web host too.
2. Pick a ThemeTo customize your WordPress classified ads website, you should pick a WordPress theme, that you can additionally tweak to your preference by organizing how your landing page should look, changing the color plan, adding or removing features, and so on.
You can look over several premium themes accessible on Themeforest such as the MyListing theme. It enables you to make any kind of directory you need, with no need of coding.
You can design your pages and get a constant review of the revisions you make to your pages.
This theme will enable you to effortlessly monetize your classified ads website by offering ad spots and permitting you to monetize posting entries in various packages.
3. Making the PagesA site is actually, an accumulation of various website pages.You would need multiple pages on your site with various information and functionalities.
The themes usually accompany pre-composed pages for various purposes. You can simply open the pages and upload the information.
Head to the widget section in the appearance menu to change the sidebar widget of the required page.
4. Managing the MenusWordPress menus are so simple to make and manage.
First, sign in to your WordPress Dashboard.
Select the 'Menus' option from the 'Appearance' menu on the left-hand side of the Dashboard to pop up the Menu Editor.
Click Create another menu at the highest point of the page.
In the Menu Name box enter a name for your new menu.
Tap the Create Menu button.
So, your new custom menu has been characterized.
5. Adding Items to a MenuYou can add various types of the link also to your menu. These are divided between the left of the menu you're as of now adjusting.
Find the panel entitled Pages. Inside this panel, select the View All link which opens a list of all the presently shared Pages on your site.
Choose the Pages that you need to include by tapping the checkbox beside each Page's title.

Tap the button Add to Menu situated at the base of the panel to include your selection(s) to the menu that you made in the above step.
Click on the button Save Menu once you've included all the menu items you need.
Finally, your custom menu is saved.
Read also : How To Create a Big Website Like Udemy? 6. Add Menu to Your SiteIn case that your present theme holds custom menus, you will have the ability to add your new menu to one of the Theme Locations. (If not, you'll have to include your new menu through the Custom Menu widget under the Appearance Widgets Screen).
Look to the base of the menu editor window.
In the area titled Theme Locations, tap the checkbox for the area where you need your menu to show up.
Then click Save menu once you've made your choice.
7. Step to add a new Classified advertisement From Back EndGo to Dashboard –>Classified –>Add New Classified
On completing all of the above steps click the button ->Publish.
8. Adding Categories Tags from Back EndJust go to Dashboard –>Classified –>Classified Tags
And, you’re done with this field!
9. Link the PagesSo, we presently have our pages made, now how the clients will associate with it?
By giving applicable links on the homepage of your classified ads site. The most essential links are given a menu and submenu items.
For example - The link for the page which gives the front-end users a chance to present their classifieds listings is introduced as a button on the homepage of the classifieds WordPress theme.
This button immediately pulls the consideration of the clients.
Thus, linking pages to the menu, submenus, and buttons on your classified site rely absolutely upon you.
You can choose the significance of every link and place them in like manner, to guarantee that the necessary links and CTAs get more introduction.
10. Add the Classifieds AdvertisementsWhen you make a classified ads site, obviously you would need to include a few classifieds listings on your site.
An admin of the site should sign in to the dashboard, and utilize the backend options for adding the classifieds listing.

Then, click on the button add classified and utilize the form to embed a section into your site.
Afterward, select the category of your classifieds advertisement. This is essential in various ways -
- It encourages the audience to discover appropriate ads without wasting time on different categories that are unnecessary.
- It supports keep your site arranged.
The further most valuable step is to add an image of your classifieds items.
It's regularly advised to upload high-quality images in your listings. Particularly when it’s a classified ads site, where you're marketing real goods.
Follow these steps:
Go to Dashboard –>Settings –>Theme Options –>General Settings
12. Monetize your WordPress Classifications WebsiteNow, we’ll discuss how your online classifieds ads directory benefits you earn real revenue.
Paid classified ads listings:
A classifieds site is where individuals list their ads. But you can choose if you want the people to list for free or pay for their advertisements.
Classifieds WordPress theme operates on the directory system. So, it has all the features to provide paid classifieds submissions.
The Classifieds WordPress theme offers compatibility to a lot of payment methods. Thus, you can simply set it up with your credentials and begin applying it for receiving online payments.
Read also : How To Make a Social Media Website? 13. Manage and Promote Your WebsiteDo not let your website convert into a public forum. You ought to activate the “Pending ads” and “Google Captcha” settings to limit improper content in your classified ads website.
Also, try to take the support of all the given functions to build up the visual.
You can manage the WordPress customizer to promptly resolve the composition of the website and adjust some generic style settings.