Blog Category283 Blogs
 Web Development
 Core PHP
 Ruby On Rails
 Yii Development
 Joomla Development
 Odoo
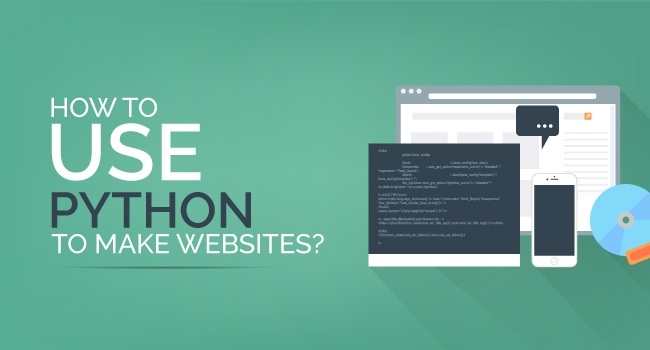
Odoo Python
 Ecommerce
 Magento Development Services
 Prestashop
 Hire a Developer
 Web Crawling Services
Learn How To Host and Deploy a Web App Using Python and Heroku
You have developed a web application. It's ultimately a time to share your wonderful work with the world. Getting your idea or dream project online is really a genuinely basic process with Google App Engine. But how?
How would you deploy it, how would you scale it, how would you control it?
What are the deployment alternatives accessible? Is a shared server sufficient for your web application or do you need a VPS?

Hosting a web application requires the arrangement of three performing artists -
-
The Application
-
The Gateway
-
The Web Server
The purpose behind building a Python-inspired web application is that a person can apply Python code to resolve what content to display to the user and what steps to take. Actually, the code is run by the web server which hosts your site. Thus, the user doesn’t require to install anything to utilize your app; as the user has an Internet connection and a browser, so everything else will be streamed online.
We have created an easy and straightforward guide that shows how you can deploy your Python web application to a server. This will lessen your trouble of searching for the solution on the web.
Here, we’ll learn to publish the Python application online on Heroku.
Deploy web app on Heroku -
We will be utilizing the git tool to transfer the local files to either the cloud or online web server whatever you like. Then, the first step is to download git from https://git-scm.com/downloads and install it.
Step 1. Getting started
-
Make an account in Heroku
-
Install the Python version on your local system.
-
Then Download Heroku CLI or Toolbelt.
Step 2. List Python Dependencies
We have to list the dependencies which are needed for the Heroku environment. To list them run pip freeze from a terminal window.
We want to put those dependencies in a file named requirements.txt. We can make that with one command -

Step 3. Head to Command Prompt
Go to your working directory and hit forthcoming commands.
Open your command line when you are within the myblog folder then type:
This will require you to insert email id and password. Enter your heroku account details as it asks about them.
Step 4. heroku create
This will build an application in Heroku that you can view on Heroku Dashboard.
Heroku does not possess a webserver. Rather, it assumes the application to handle its own webserver. A Python webserver to be employed is gunicorn.
Gunicorn appears as a Python library, then you've to install it with pip. To do this in the command line, type -
![]()
Step 5. Create Procfile
Build an empty file and name it Procfile in your current folder.
Afterward in the empty fileenter this line: web: gunicornapp.hello:app The file ought not to have any extension. Thus, ensure the file name is not capturing a .txt extension.
Make a requirements.txt file by typing as follows:
![]()
This will start creating Python libraries which are established in your virtual environment and write the list within the requirements.txt file. Then that file will be transmitted and read by the webserver as a result the webserver will know which libraries to install so that application works precisely.
Presently, Heroku by default may run Python 2 for the apps that are sent to it. Hence, it would be a great idea to tell what Python version your application has been created to work with. If you are using Python 3.5.1. then to do that.You must build a runtime.txt file and include this line in there: python-3.5.1
This will show Heroku what Python to apply when running your application.
You have presently developed all your files for deployment with the two files (requirements.txt and Procfile) you built.
We can confirm that our app operates by running python app.py and later go to 127.0.0.1:5000 in the browser to view it in operation.
Step 6. git add.
Now we will add all the files.
Append all your local files to the online repository by typing -git add .
Ensure to incorporate the dot after add. This dot indicates that you are adding the whole directory to the repository.
The following step comprises of building an empty app on heroku and conveying our local files to that app. We will be sending the files utilizing git.
But prior to applying the git commands for sending our files to Heroku, you require to report git who you are. So, type this in the command line:

Ensure to substitute your email address and name properly in the above lines retaining the double quotes.
Form a local git repository by typing:git init
Step 7. git commit -m “App ready to

We took python app deployment as the name for our app. Kindly ensure that you choose your own needed name. When the command is successfully performed, you will notice that your application has been built in the Heroku account beneath the menu called Personal Apps.
Step 8. git push heroku master
Now, the final step!
It’ll push the whole app on Heroku Server.Here we will push our app to Heroku -
git push heroku master
Finally, ensure minimum one situation of the app is running with:
herokups:scale web=1
If you got here easily without any errors, your website must be now live. Ours is at live pythonappdeployment.heroku.com. Yours will be as per the name that was chosen by you.
Step 9. heroku open
Hit the app through created URL or with the above-given command.
Step 10. heroku logs
In case that anything goes wrong than it’s used to verify the logs.
Conclusion
So, why was Heroku an ideal choice in this tutorial?
Heroku, a cloud platform that supports Python web apps is created with different programming languages along with applications developed with Python flask. Heroku make deployment simpler by managing administrative duties on its own. Thus, a person can concentrate on the programming section.

Another great feature is that you can also host your Python web applications free of cost. While you get more traffic after some time, you may need to sign up for the better plan in order to let your web application function adequately during high traffic.
You can likewise have your personal free subdomain on top of herokuapp.com or utilize your own domain in case you have purchased one.