Blog Category283 Blogs
 Web Development
 Core PHP
 Ruby On Rails
 Yii Development
 Joomla Development
 Odoo
Odoo Python
 Ecommerce
 Magento Development Services
 Prestashop
 Hire a Developer
 Web Crawling Services
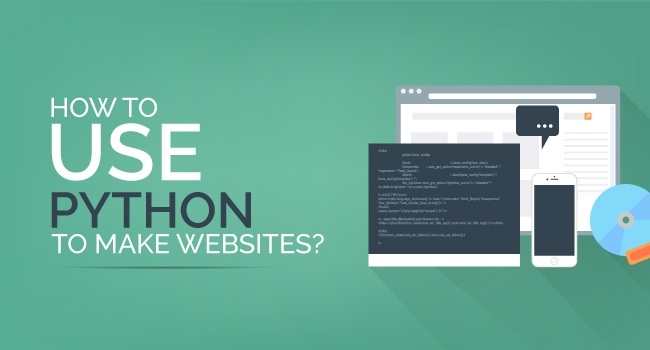
How to Create an App using Django Framework -Tutorial
Django is an open-source and free web framework written in Python which supports re-usability, scalability, and rapid development. It is extremely developed and comes with high-quality documentation and excellent features incorporated by default.
Owing to the exact reason, Django is an excellent option to develop app as it is packed with robust functionalities.
But learning how to do it is a bit tricky. Let’s tackle that situation once and for all in the easiest way possible.
PrerequisitesFirst install Django then to set the foundation for our application. We need to create the project skeleton applying the django-admin command. This is as easy as utilizing its admin script. This generated project will be the groundwork of our blog app.
Django-admin startprojecthelloapp
Now cd over to the new folder:
cd ~/sites/dev/djangoblog
This is running to be our project folder in which we will include multiple apps. Some we’ll make and we’ll be downloading projects from Google Code. Keep your Python import statements clean and free of project-specific module names. Ensure your root project folder (in this tutorial, djangoblog) on the Python path. To do that, simply add the path to your PythonPath variable.

We can record statements like:
import myapp instead of import myproject.myappIt makes your code more manageable.
Fill out the project settings
Open your preferred text editor and fire up the settings.py file within the “djangoblog” directory.
The core of what we want to set up is found on the top of the file.
Be certain to add the entire pathname, as Django can't know ~/ or $HOME in determining the database ie /Users/usrname/Sites/dev/djangoblog/djangoblog.db
The additional settings are properly documented in the settings.py file and we can leave most of them. However, there are a few of the settings we should take care of before going further. If you see at the base of the settings.py file you’ll see this piece of code:
INSTALLED_APPS = ( 'django.contrib.auth', 'django.contrib.contenttypes', 'django.contrib.sessions', 'django.contrib.sites', )
Here we will tell our Django project which apps to install. First, let’s add Django’s built-in admin tool. Paste this line just under the sites app:
'django.contrib.admin',
Here's a convenient trick for the template directories. Rather than hard-coding the path to our templates directories this is effective - it makes it so easy to change Django utilizing Python. We simply import the os.path Python module and after that discover the way to the directory where settings.py is and afterward adds 'templates' to that way.
import os.path TEMPLATE_DIRS = ( os.path.join(os.path.dirname(__file__), 'layouts'), )
Presently when we launch the site live, there's no requirement to change the file- settings.py.
Now, how about we utilize one of the tools incorporated into manage.py, the syncdb device. Paste this line in the terminal:

python manage.pysyncdb
The syncdb tool advises Django to interpret all our installed applications' models.py documents into a real database table.
Create your username and password, now it’s time to launch the Django’s built-in server.
Start the SeverAt the command prompt, Django starts the server:
/djangoblog/ $ python manage.pyrunserver Validating models... 0 errors found Django version 0.97-pre-SVN-6920, using settings 'djangoblog.settings' Development server is running at http://127.0.0.1:8000/ Quit the server with CONTROL-C.Then open your browser and head to http://127.0.0.1:8000/.
It works! But then check out the admin interface. Nevertheless, before we do that, we require telling Django what the admin URL is.
Open your text editor and the file urls.py in your “djangoblog” folder. Copy-paste the below-given code, replace what’s already there in the file:
from django.conf.urls.defaults import * from django.contrib import admin # Uncomment the next two lines to enable the admin: # from django.contrib import admin admin.autodiscover() urlpatterns = patterns('', (r'^admin/(.*)', admin.site.root), )Now we'll head to http://127.0.0.1:8000/admin/. Log in with the user/pass combo you created before.
In any case, right now there isn't much to find in the admin system, so we should begin developing our blog.
Developing the blogPresently we could simply toss in some code that makes a title, date field, entry, and different nuts and bolts.
Let’s go onward and create first Django application.
To do this we’ll utilize Django’s app creating script, which is found inside manage.py in our project folder. Paste line below into your shell:
python manage.py startapp blog
If you see inside “djangoblog” you must see a new “blog” folder. Open that and locate the models.py file. Open models.py in your preferred text editor and paste in the below-given code:
from django.db import models from django.contrib.syndication.feeds import Feed from django.contrib.sitemaps import Sitemap import markdown from tagging.fields import TagField from tagging.models import Tag # Create your models here. class Entry(models.Model): title = models.CharField(max_length=200) slug = models.SlugField( unique_for_date='pub_date', help_text='Automatically built from the title.' ) body_html = models.TextField(blank=True) body_markdown = models.TextField() #note, if you're using Markdown, include this field, otherwise just go with body_htmlpub_date = models.DateTimeField('Date published') tags = TagField() enable_comments = models.BooleanField(default=True) PUB_STATUS = ( (0, 'Draft'), (1, 'Published'), ) status = models.IntegerField(choices=PUB_STATUS, default=0) class Meta: ordering = ('-pub_date',) get_latest_by = 'pub_date' verbose_name_plural = 'entries' def __unicode__(self): return u'%s' %(self.title) def get_absolute_url(self): return "/%s/%s/" %(self.pub_date.strftime("%Y/%b/%d").lower(), self.slug) def save(self): self.body_html = markdown.markdown(self.body_markdown, safe_mode = False) super(Entry, self).save()
First, we import the basic things from django, such as the Feed class, model class, and Sitemap class.
After that, we can create our blog model.
Entry stretches Django’s built-in model.
The first part of our Entry class definition describes all our multiple blog entry elements. Django will utilize this data to build our database tables and structure, and further generate the Admin interface.
Another thing worth noticing is the body_html = models.TextField(blank=True) line. What’s up with that blank=True bit? This information is part of Django’s built-in Admin error checking.
Except you tell it contrarily, all fields in your model will produce NOT NULL columns in your database. To permit for null columns, we would add null=True. But with that Django’s Admin system would yet complain that it requires the information. For that, simply add the blank=True.
But, what we need to do is fill in the body_html field programmatically — after saving in the Admin and prior to Django really writes to the database. Therefore, we want the Admin division to allow body_html to be blank, but not null.
Presently we’ll inform Django about our new apps. Fire up settings.py again and add the below lines to your list of installed apps:
INSTALLED_APPS = ( 'django.contrib.auth', 'django.contrib.contenttypes', 'django.contrib.sessions', 'django.contrib.sites', 'django.contrib.admin', 'djangoblog.blog', )
After that, head to the terminal and run manage.pysyncdb.
Even if Django knows about blog app, we haven’t reported the app what to do in the Admin section.
So, go back to your text editor and make a new file. Name it admin.py and save it within the “blog” folder. And add these lines:
from django.contrib import admin from djangoblog.blog.models import Entry class EntryAdmin(admin.ModelAdmin): list_display = ('title', 'pub_date','enable_comments', 'status') search_fields = ['title', 'body_markdown'] list_filter = ('pub_date', 'enable_comments', 'status') prepopulated_fields = {"slug" : ('title',)} fieldsets = ( (None, {'fields': (('title', 'status'), 'body_markdown', ('pub_date', 'enable_comments'), 'tags', 'slug')}), ) admin.site.register(Entry, EntryAdmin)
So, what does all that do?
The initial thing to do is import Django’s admin class, as you might doubt, admin regulates how the admin interface seems. Those customizations are completely optional. You could just write pass and run with the default admin layout.
When you refresh your admin page you can now view the blog model with a link to create and write blog entries.
Click “Add new.” Now you're ready to create some blog entries.